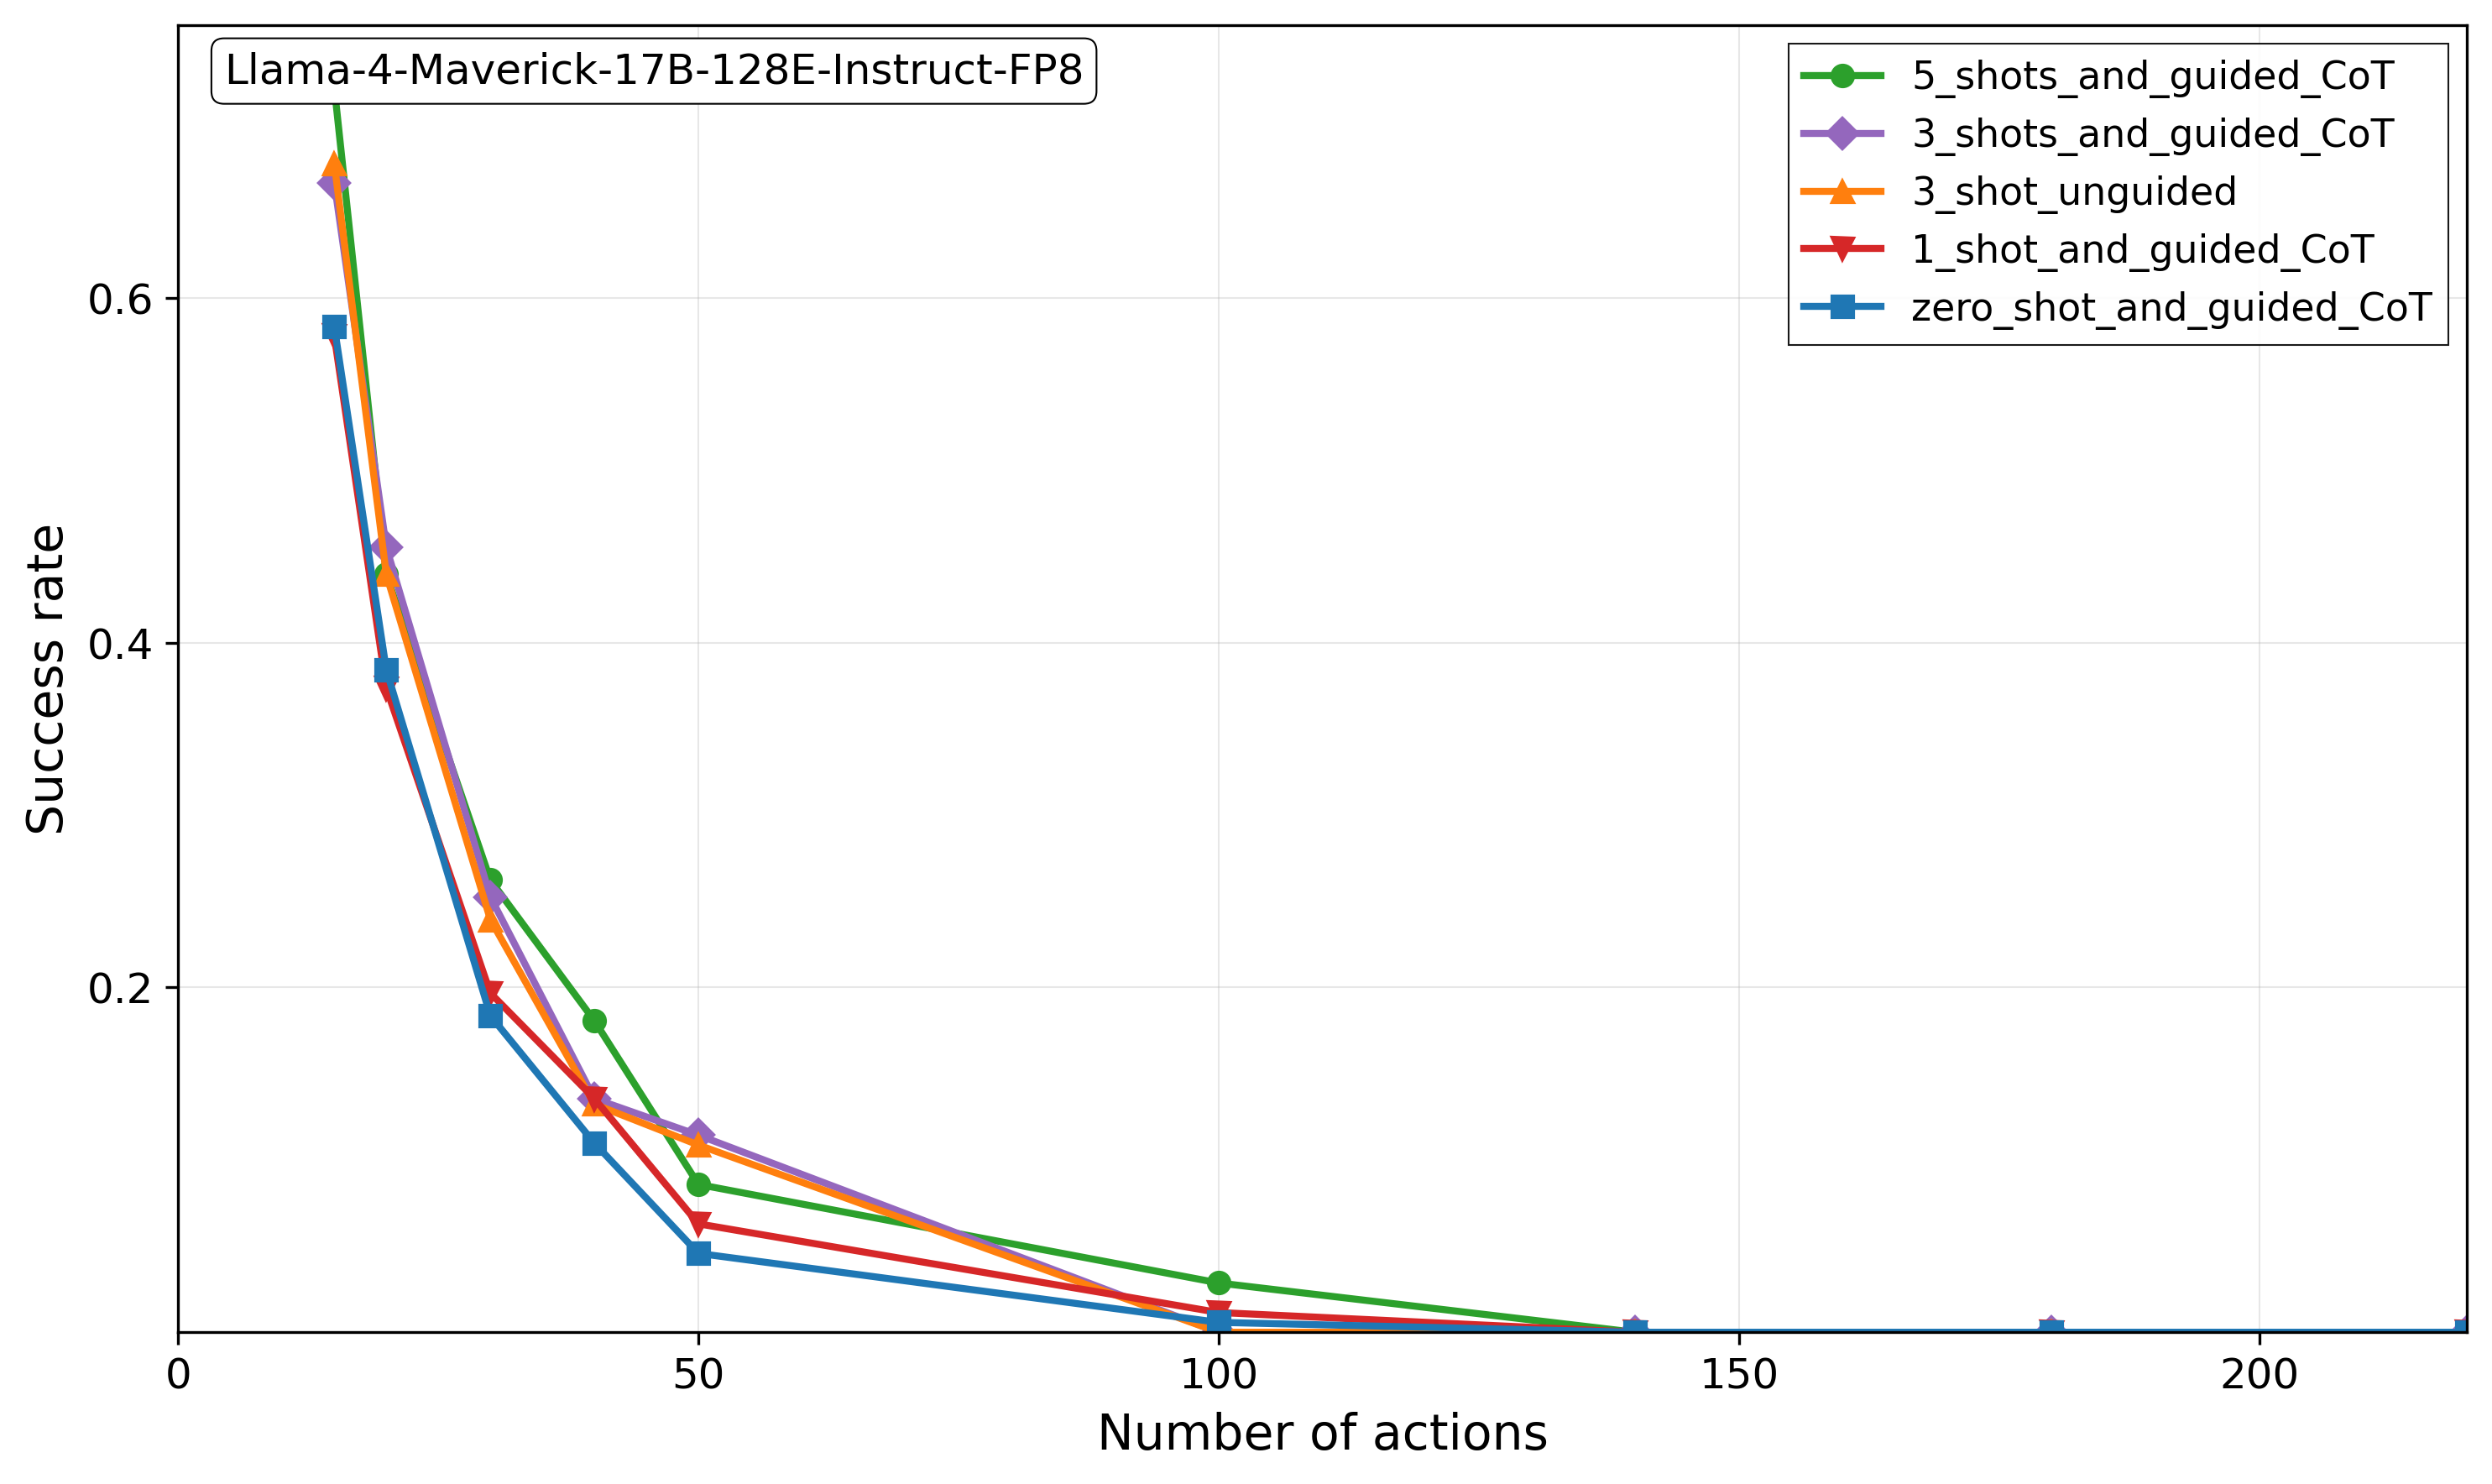
## Line Chart: Success Rate vs. Number of Actions
### Overview
This line chart depicts the relationship between the number of actions taken and the success rate for different prompting strategies used with the Llama-4-Maverick-17B-128E-Instruct-FP8 model. Five different prompting strategies are compared. The chart shows how success rate declines as the number of actions increases, with varying rates of decline for each strategy.
### Components/Axes
* **Title:** Llama-4-Maverick-17B-128E-Instruct-FP8 (located in the top-left corner)
* **X-axis:** Number of actions (ranging from 0 to approximately 200).
* **Y-axis:** Success rate (ranging from 0 to approximately 0.7).
* **Legend:** Located in the top-right corner, listing the following prompting strategies with corresponding colors:
* 5\_shots\_and\_guided\_CoT (Green)
* 3\_shots\_and\_guided\_CoT (Orange)
* 3\_shot\_unguided (Red)
* 1\_shot\_and\_guided\_CoT (Brown)
* zero\_shot\_and\_guided\_CoT (Blue)
### Detailed Analysis
Here's a breakdown of each line's trend and approximate data points, verified against the legend colors:
* **5\_shots\_and\_guided\_CoT (Green):** The line starts at approximately 0.18 at 0 actions, decreases slowly to around 0.10 at 50 actions, and plateaus around 0.08-0.10 for actions greater than 50.
* **3\_shots\_and\_guided\_CoT (Orange):** The line begins at approximately 0.22 at 0 actions, decreases more rapidly than the green line, reaching around 0.12 at 50 actions, and then levels off around 0.10-0.12 for actions greater than 50.
* **3\_shot\_unguided (Red):** This line shows the most rapid initial decline. It starts at approximately 0.65 at 0 actions, drops to around 0.08 at 50 actions, and continues to decrease slightly to around 0.06 at 200 actions.
* **1\_shot\_and\_guided\_CoT (Brown):** The line starts at approximately 0.25 at 0 actions, decreases to around 0.13 at 50 actions, and then plateaus around 0.10-0.12 for actions greater than 50.
* **zero\_shot\_and\_guided\_CoT (Blue):** This line also shows a rapid initial decline. It begins at approximately 0.58 at 0 actions, drops to around 0.08 at 50 actions, and continues to decrease slightly to around 0.06 at 200 actions.
### Key Observations
* The "3\_shot\_unguided" and "zero\_shot\_and\_guided\_CoT" strategies exhibit the steepest declines in success rate as the number of actions increases.
* The "5\_shots\_and\_guided\_CoT" strategy maintains the highest success rate, though it is still affected by the increasing number of actions.
* The "3\_shots\_and\_guided\_CoT" and "1\_shot\_and\_guided\_CoT" strategies show similar performance, with a moderate decline in success rate.
* All strategies converge to a similar success rate (around 0.06-0.12) as the number of actions increases beyond 50.
### Interpretation
The data suggests that the choice of prompting strategy significantly impacts the success rate, particularly as the complexity of the task (measured by the number of actions) increases. The "unguided" approach appears to be more sensitive to task complexity, experiencing a more dramatic drop in success rate. Guided Chain-of-Thought (CoT) prompting generally improves performance, and increasing the number of shots (examples) further enhances success, though the gains diminish with more actions. The convergence of all lines at higher action counts indicates a fundamental limit to performance regardless of the prompting strategy, potentially due to inherent limitations in the model's reasoning capabilities or the task itself. The initial high success rates for the "unguided" strategies suggest they may be effective for simpler tasks, but quickly become unreliable as the task becomes more complex. The chart provides valuable insights for optimizing prompting strategies for the Llama-4-Maverick-17B-128E-Instruct-FP8 model, highlighting the importance of guided reasoning and sufficient examples for complex tasks.