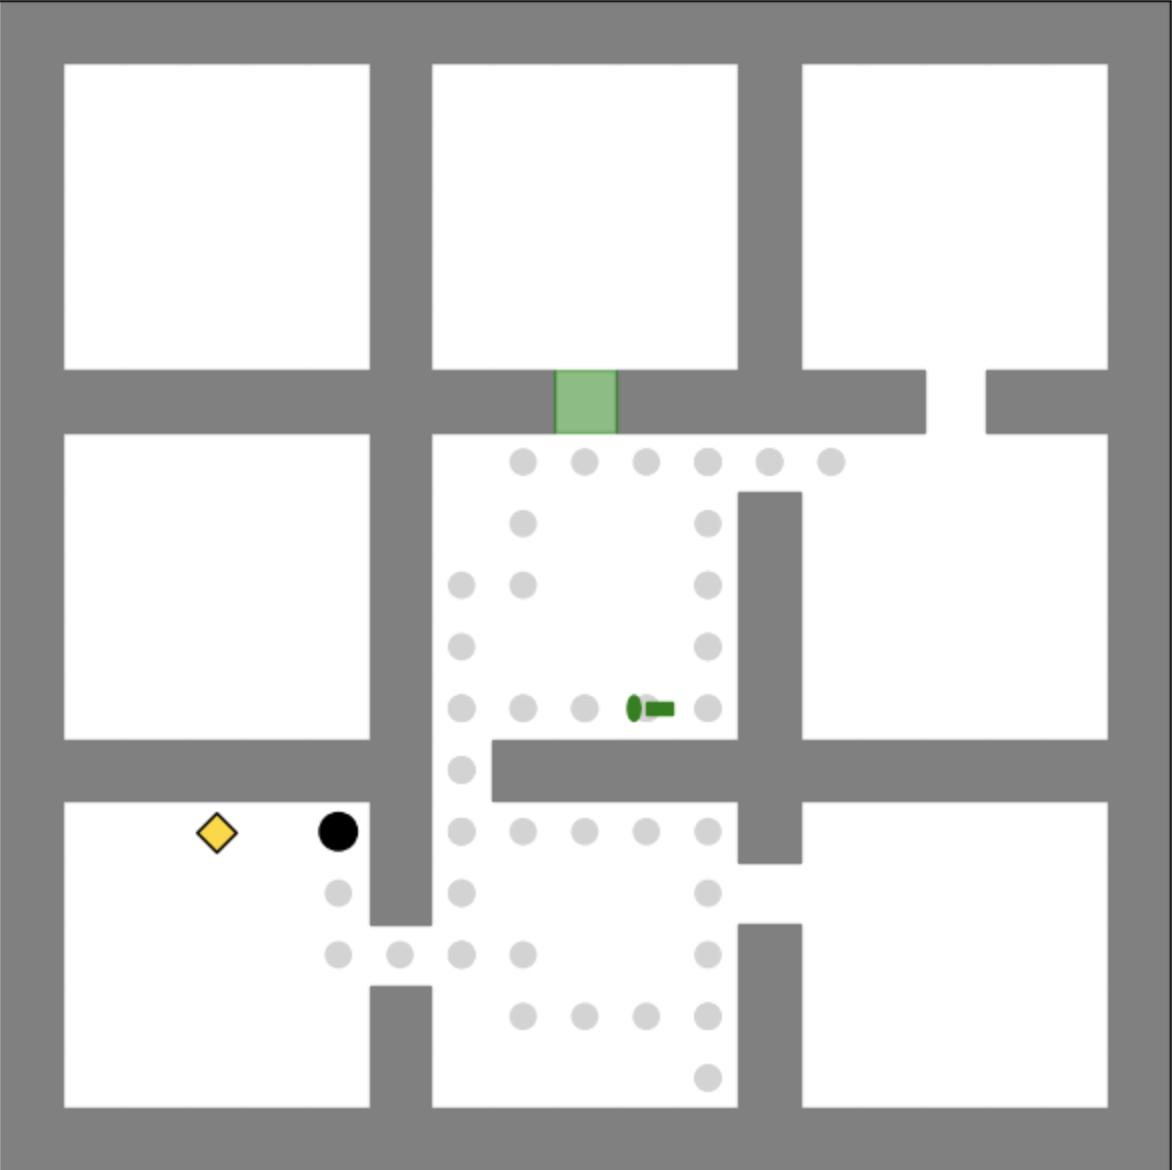
## Diagram: Grid-Based Navigation Maze
### Overview
The image displays a top-down, schematic diagram of a grid-based environment, resembling a simplified floor plan or maze. The layout consists of white rectangular "rooms" or open areas separated by gray "walls" or corridors. There are no textual labels, axes, or numerical data present. The diagram appears to illustrate a pathfinding or navigation scenario within a structured space.
### Components/Axes
* **Grid Structure:** The environment is organized into a 3x3 grid of large white rectangular areas (potential rooms), though the central column's middle and bottom rectangles are merged into a larger, irregular space.
* **Walls/Corridors:** Thick gray lines form the boundaries and pathways between the white areas. The walls create a specific maze-like configuration.
* **Key Objects:**
1. **Green Rectangle:** Positioned at the top-center of the diagram, embedded within the horizontal gray wall separating the top-center and middle-center white areas. It appears to represent a door or entrance/exit point.
2. **Green Cylinder/Object:** Located in the central white area, slightly right of center. It is oriented horizontally and appears to be an agent, robot, or movable object within the space.
3. **Yellow Diamond:** Situated in the bottom-left white room, near its top-right corner.
4. **Black Circle:** Also in the bottom-left white room, positioned to the right of the yellow diamond.
* **Path Indicators:** A series of light gray dots forms a dotted line. This path originates from the green rectangle (door) at the top, travels down into the central area, makes a right-angle turn left, proceeds down, turns right, and continues down into the bottom-center area, ending near the bottom-right corner of that space. The path suggests a planned or historical route.
### Detailed Analysis
* **Spatial Layout:**
* **Top Row:** Three distinct white rectangles (left, center, right).
* **Middle Row:** Left white rectangle is distinct. The center and right areas are connected via an opening in the wall between them, but the center area is partially blocked by a vertical gray wall segment extending down from the top-right corner of the middle-center space.
* **Bottom Row:** Left white rectangle is distinct. The center and right areas are connected, forming one large irregular space.
* **Object Placement & Path:**
* The **Green Cylinder** is positioned within the central area, seemingly along or near the dotted path.
* The **Yellow Diamond** and **Black Circle** are co-located in the bottom-left room, which is *not* directly on the dotted path. The path ends in the adjacent bottom-center/right area.
* The **dotted path** demonstrates a clear, deliberate route from the top entrance (green rectangle) through the central corridor system, navigating around the internal wall structures, and terminating in the lower section of the maze.
### Key Observations
1. **Asymmetric Maze Design:** The internal walls create an asymmetric layout. The right side of the middle row has a narrow passage, while the central column features a more open but segmented path.
2. **Path Termination:** The dotted path does not connect to the room containing the yellow diamond and black circle. It ends in a different section of the maze.
3. **Object Isolation:** The yellow diamond and black circle are isolated in a room with only one visible entrance/exit (the opening to their right), which is not the path taken by the dotted line.
4. **Color Coding:** Colors are used functionally: green for interactive elements (door, cylinder/agent), yellow and black for distinct static objects or goals, gray for structure and path hints.
### Interpretation
This diagram is likely a schematic for a **robotics navigation task, a game level, or a pathfinding algorithm visualization**. The elements suggest the following narrative or problem setup:
* **The Environment:** A structured, constrained space with rooms and corridors.
* **The Agent/Start Point:** The green cylinder may represent an agent starting at or near the green door (entrance).
* **The Path:** The dotted line represents a computed or executed path from the entrance through the maze. Its specific route shows how the agent must navigate around internal obstacles (the gray walls).
* **Potential Goals or Landmarks:** The yellow diamond and black circle in the isolated bottom-left room could be target objects, goals, or points of interest. The fact that the path does not lead to them is a critical observation. It could mean:
* The path shown is incomplete or represents only the first segment of a longer journey.
* The path is for a different objective, and reaching the diamond/circle requires a separate, unplotted route.
* The diamond and circle are obstacles or markers to be avoided in this specific path plan.
* **The Core Challenge:** The diagram emphasizes spatial reasoning and connectivity. The key informational takeaway is the **discrepancy between the plotted path and the location of the distinct objects (diamond/circle)**, highlighting a potential problem of goal accessibility or multi-stage planning within the maze.