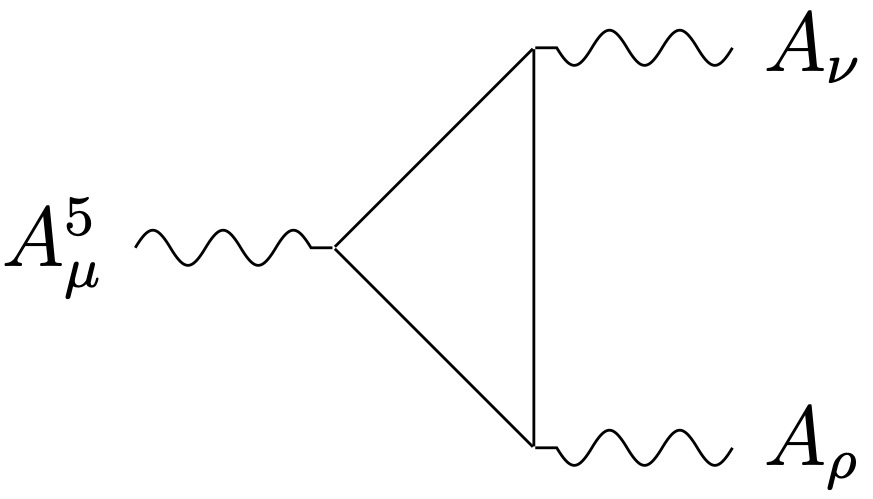
# Technical Diagram Analysis
## Diagram Type
Feynman diagram depicting particle interactions.
## Key Components
1. **Vertices**:
- **Left Vertex**: Labeled $ A_\mu^5 $ (muon field with superscript 5).
- **Top Right Vertex**: Labeled $ A_\nu $ (nu field).
- **Bottom Right Vertex**: Labeled $ A_\rho $ (rho field).
2. **Lines**:
- **Wavy Lines**: Represent gauge boson propagators (e.g., photons, W/Z bosons).
- One wavy line connects to $ A_\mu^5 $.
- Two wavy lines connect to $ A_\nu $.
- Two wavy lines connect to $ A_\rho $.
3. **Central Vertex**:
- A single vertex connects all three labeled vertices ($ A_\mu^5 $, $ A_\nu $, $ A_\rho $).
## Structural Details
- **Flow**:
- $ A_\mu^5 $ emits a wavy line to the central vertex.
- The central vertex splits into two wavy lines: one to $ A_\nu $ and one to $ A_\rho $.
- **Symmetry**:
- $ A_\nu $ and $ A_\rho $ receive identical wavy line connections from the central vertex.
## Absent Elements
- No legends, axis titles, or data tables present.
- No numerical data or categorical labels beyond vertex/line identifiers.
## Interpretation
The diagram illustrates a theoretical interaction where a muon field ($ A_\mu^5 $) couples to a central vertex, which mediates interactions between $ A_\nu $ and $ A_\rho $ fields via gauge bosons. The superscript "5" on $ A_\mu $ may indicate a specific representation or state in the underlying theory.