## Diagram: Abstract Navigation Map or Maze Layout
### Overview
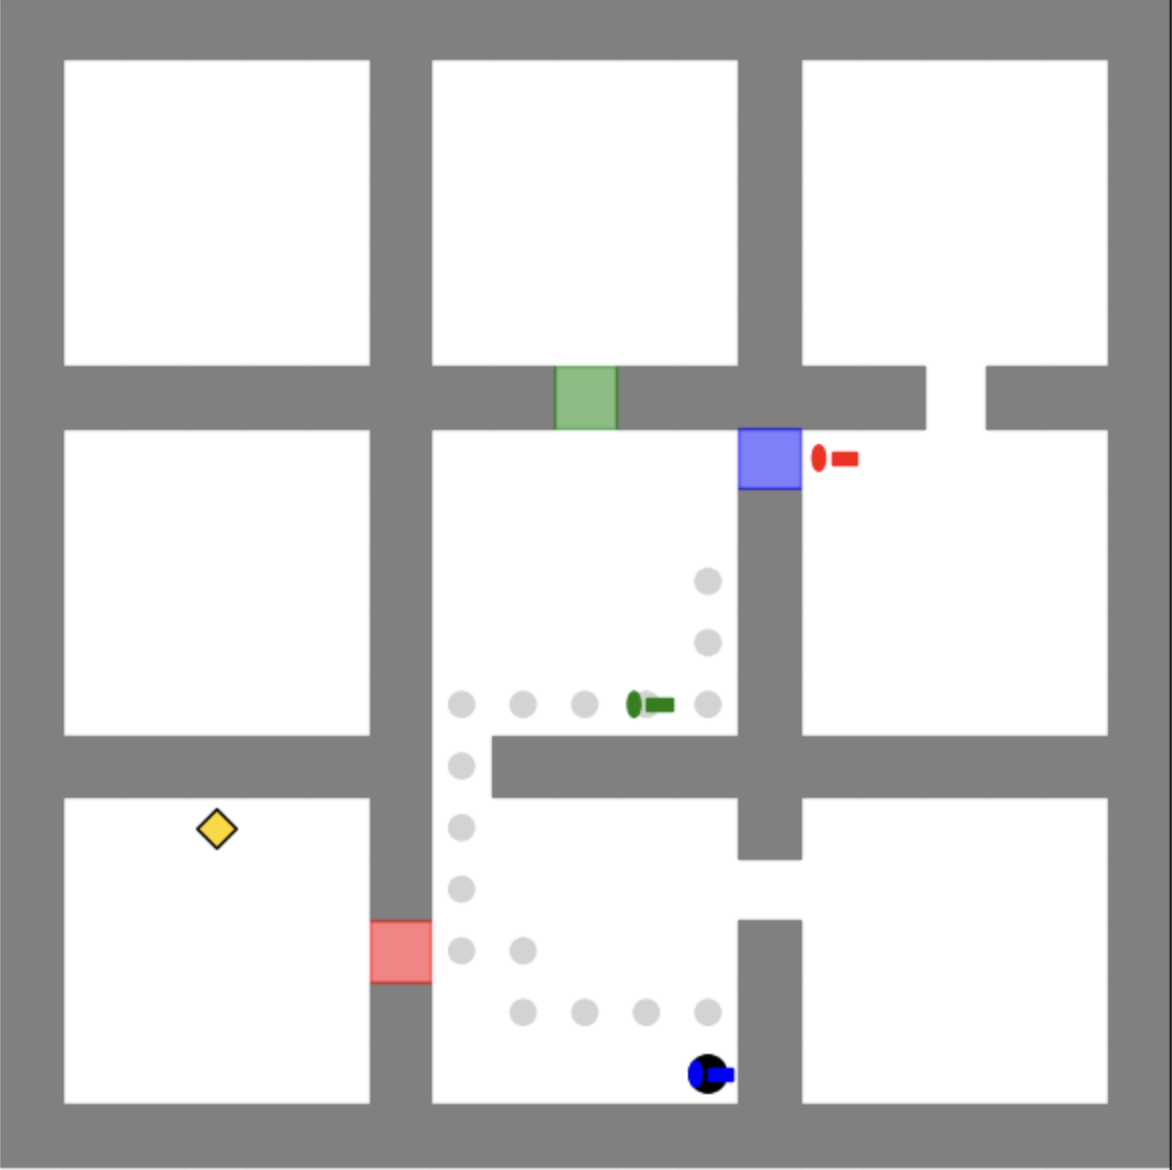
The image displays a top-down, schematic diagram resembling a floor plan, maze, or navigation grid. It consists of a network of white rectangular "rooms" or open areas separated by thick gray "walls" or corridors. Within this structure, several colored geometric shapes and dotted paths are present, suggesting agents, objects, waypoints, or interactive elements. There is no embedded text, labels, or numerical data within the image.
### Components/Axes
* **Structure:** A 3x3 grid of primary white rectangular areas (rooms), though not all are fully enclosed or connected in a standard grid pattern.
* **Walls/Corridors:** Thick, solid gray lines form the boundaries and pathways between the white rooms.
* **Colored Elements (Potential Objects/Agents):**
* **Green Square:** Located at the bottom-center of the top-middle room, embedded in the wall.
* **Blue Square:** Located at the top-left corner of the center-right room, embedded in the wall.
* **Red Square:** Located at the bottom-right corner of the bottom-left room, embedded in the wall.
* **Yellow Diamond:** Located in the center of the bottom-left room.
* **Red Circle with Line:** Located immediately to the right of the Blue Square, in the center-right room. The line extends horizontally to the right.
* **Green Circle with Line:** Located in the center of the central room. The line extends horizontally to the right.
* **Blue Circle with Line:** Located at the bottom-center of the central room. The line extends horizontally to the right.
* **Paths:** A series of light gray dots form a connected path. The path originates near the Green Circle, moves left, then down along the left wall of the central room, then right along the bottom wall, ending at the Blue Circle.
### Detailed Analysis
* **Spatial Layout & Connectivity:**
* The top-left, top-right, middle-left, and bottom-right rooms appear to be isolated dead-ends with no visible connections to the central path network.
* The top-middle room connects to the central room via the Green Square in the wall.
* The central room is the main hub, containing the Green Circle and connecting to the path network.
* The bottom-left room connects to the central room via the Red Square in the wall.
* The center-right room connects to the central room via the Blue Square in the wall.
* **Pathway Flow:** The dotted path indicates a clear route: Start at/near the Green Circle → Move Left → Move Down (along left wall) → Move Right (along bottom wall) → End at/near the Blue Circle. This path does not directly connect to any of the colored squares in the walls.
* **Element Relationships:** The colored squares (Green, Blue, Red) are positioned in walls, suggesting they may be doors, gates, or transition points. The colored circles with lines (Green, Blue, Red) are positioned within rooms, with their lines all pointing right, possibly indicating direction, orientation, or a state (e.g., "facing right"). The Yellow Diamond is isolated in its room.
### Key Observations
1. **Asymmetry and Isolation:** The layout is not perfectly symmetrical. Several rooms (top-left, top-right, middle-left, bottom-right) are completely isolated from the main path network shown.
2. **Path vs. Doors:** The explicit dotted path does not utilize any of the colored square "doors." It remains entirely within the central and bottom-left room complex.
3. **Color Coding:** Colors are used consistently for shapes: Green (square & circle), Blue (square & circle), Red (square & circle), and Yellow (diamond). This likely signifies different types or teams of objects/agents.
4. **Directional Indicators:** All three circles have a short, horizontal line extending to their right, suggesting a common directional property.
### Interpretation
This diagram is likely a **schematic for a game level, a robotics navigation test environment, or a conceptual model for a multi-agent system**. The elements suggest the following functional relationships:
* **Gray Walls/White Rooms:** Define the navigable space and obstacles.
* **Colored Squares in Walls:** Likely represent **doors, portals, or checkpoints** that may be opened or activated by corresponding agents (e.g., the Green agent might interact with the Green door).
* **Colored Circles with Lines:** Likely represent **agents, robots, or key objects**. Their lines indicate a default orientation or heading (east/right). The Green and Blue agents are connected by a plotted path, suggesting a planned route or a trace of movement. The Red agent is positioned near a door but not on the main path.
* **Yellow Diamond:** Represents a **unique objective, target, or item** (e.g., a goal, key, or treasure) located in an isolated room. Reaching it would require navigating through the Red door from the central area.
* **Dotted Path:** Illustrates a specific **trajectory or algorithm output** for moving from the Green agent's position to the Blue agent's position, possibly demonstrating a pathfinding solution that avoids the doors.
**In summary, the image conveys a spatial puzzle or operational scenario.** The core task implied is navigating the environment, potentially using agents to interact with color-coded doors to access isolated areas (like the room with the Yellow Diamond), while the shown path demonstrates a direct route between two agents within the connected central zone. The lack of text means all meaning is derived from symbolic visual language.