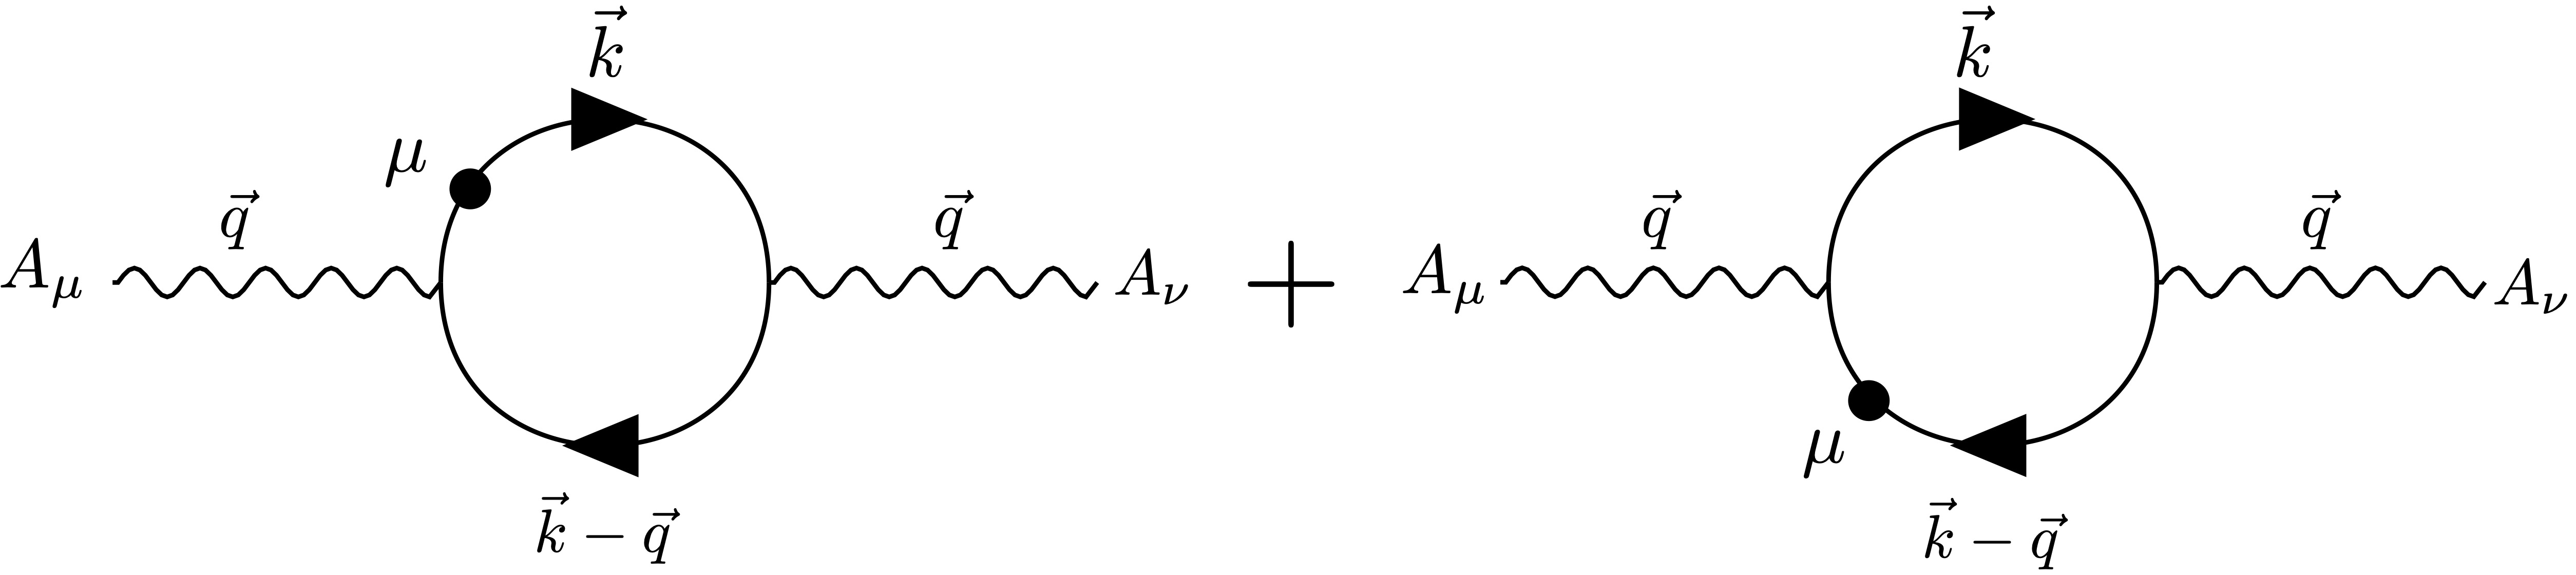
The image depicts a Feynman diagram illustrating two possible photon emission processes involving a muon (μ) and a photon (A_μ). Below is a detailed technical breakdown:
---
### **Components and Flow**
1. **Left Diagram**:
- A muon (μ) is represented by a solid black circle.
- A photon (A_μ) is emitted from the muon, depicted as a wavy line labeled with a momentum vector **q** (→q).
- The photon propagates to the right, interacting with another photon (A_ν) via a wavy line labeled **q** (→q).
- The muon’s initial momentum is labeled **k** (→k), and its final momentum after photon emission is labeled **k - q** (→k - →q).
2. **Right Diagram**:
- A photon (A_μ) is emitted from the muon, depicted as a wavy line labeled **q** (→q).
- The photon propagates to the right, interacting with another photon (A_ν) via a wavy line labeled **q** (→q).
- The muon’s initial momentum is labeled **k** (→k), and its final momentum after photon emission is labeled **k - q** (→k - →q).
3. **Summation**:
- The two diagrams are connected by a "+" symbol, indicating the total amplitude is the sum of both processes.
---
### **Key Labels and Notation**
- **μ**: Muon particle (solid black circle).
- **A_μ, A_ν**: Photon fields (wavy lines).
- **→k**: Initial momentum of the muon.
- **→q**: Momentum of the emitted photon.
- **→k - →q**: Final momentum of the muon after photon emission.
---
### **Interpretation**
The diagram represents quantum electrodynamics (QED) interactions where a muon emits a photon (A_μ) and scatters off another photon (A_ν). The two diagrams account for different photon emission paths:
1. Photon emission before scattering (left diagram).
2. Photon emission after scattering (right diagram).
The momentum conservation is enforced by the labels **k**, **q**, and **k - q**, ensuring the total momentum is preserved in each process.
---
This description captures all textual and symbolic information from the diagram, omitting no labels or structural details.