\n
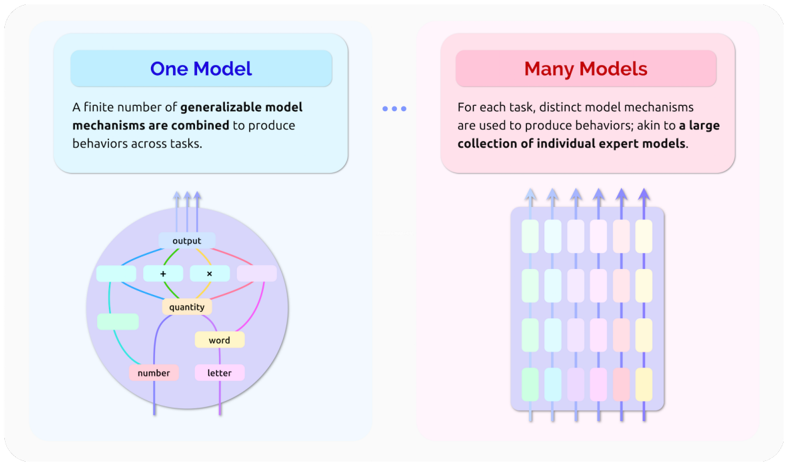
## Diagram: One Model vs. Many Models
### Overview
The image presents a comparative diagram illustrating two approaches to model design: "One Model" and "Many Models." The "One Model" approach depicts a centralized system with generalized mechanisms, while the "Many Models" approach shows a distributed system with specialized mechanisms for each task. The diagram uses visual metaphors of a circular hub and a grid of individual units to represent these concepts.
### Components/Axes
The diagram is divided into two main sections, visually separated by a series of blue dots.
* **Left Side: "One Model"** - Background color is light blue. Contains a circular diagram with interconnected nodes.
* **Right Side: "Many Models"** - Background color is light pink. Contains a grid-like structure of rectangular units.
* **Text Blocks:** Each side has a descriptive text block above its respective diagram.
### Detailed Analysis or Content Details
**"One Model" Side:**
* **Text Block:** "A finite number of generalizable model mechanisms are combined to produce behaviors across tasks."
* **Central Circle:** A large, light-purple circle labeled "output" is at the center.
* **Input Nodes:** Four oval-shaped nodes surround the central circle:
* "number" (light-orange) - positioned at the bottom.
* "letter" (light-yellow) - positioned to the right of "number".
* "word" (light-green) - positioned to the left of "number".
* "quantity" (light-blue) - positioned above "number".
* **Operators:** Two small, light-blue rectangles labeled "+" and "x" are positioned within the central circle.
* **Connections:** Curved arrows connect the input nodes to the central circle and to each other. The arrows are colored to match the input nodes they originate from. Arrows also point from the central circle upwards.
**"Many Models" Side:**
* **Text Block:** "For each task, distinct model mechanisms are used to produce behaviors; akin to a large collection of individual expert models."
* **Grid Structure:** A grid of approximately 6x8 rectangular units.
* **Color Variation:** Each unit within the grid is filled with a different pastel color (light-blue, light-green, light-yellow, light-orange, light-purple, and a lighter shade of pink).
* **Arrows:** Arrows point downwards towards the grid and upwards from the grid.
### Key Observations
* The "One Model" side emphasizes integration and generalization, with a single point of output derived from multiple inputs.
* The "Many Models" side emphasizes specialization and distribution, with each unit representing a dedicated model for a specific task.
* The color coding in both diagrams helps to visually link inputs to outputs and to differentiate between individual components.
* The diagram does not contain any numerical data or precise measurements. It is a conceptual illustration.
### Interpretation
The diagram illustrates a fundamental trade-off in model design. The "One Model" approach aims for broad applicability and efficiency by combining multiple mechanisms into a single system. However, this can lead to complexity and potential limitations in performance for specific tasks. The "Many Models" approach prioritizes specialization and accuracy by dedicating a separate model to each task. This can result in a more robust and adaptable system, but at the cost of increased resource requirements and potential redundancy.
The diagram suggests that the choice between these two approaches depends on the specific application and the relative importance of generalization, specialization, and efficiency. The analogy to "individual expert models" in the "Many Models" description highlights the benefits of domain-specific knowledge and tailored solutions. The diagram is a high-level conceptual representation and does not provide any quantitative data to support a specific conclusion. It serves as a visual aid for understanding the different design philosophies.