## Grid-Based Symbol Diagram: 10x10 Matrix with Discrete Elements
### Overview
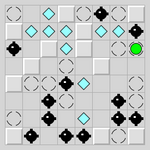
The image displays a 10x10 grid composed of light gray squares separated by darker gray grid lines. Within this grid, various geometric symbols are placed at specific intersections or cell centers. The diagram appears to represent a spatial arrangement of distinct elements, possibly for a game board, schematic, or data visualization. There is no accompanying text, axis labels, or numerical data.
### Components/Axes
* **Grid Structure:** A 10x10 matrix. Rows can be numbered 1-10 from top to bottom, and columns 1-10 from left to right for precise spatial grounding.
* **Symbol Types:** Four distinct visual elements are present:
1. **Black Diamond:** A solid black diamond shape (◆).
2. **Light Blue Diamond:** A solid light blue/cyan diamond shape (◆).
3. **White Circle:** A white circle with a thin black outline (○).
4. **Green Square:** A single, solid bright green square (■).
* **Legend:** No explicit legend is provided within the image. Symbol meaning must be inferred from context or external knowledge.
### Detailed Analysis
**Spatial Distribution and Coordinates (Row, Column):**
* **Black Diamonds (◆):** Found at (1,1), (1,7), (2,1), (2,8), (3,1), (4,5), (5,4), (5,6), (6,3), (6,7), (6,9), (7,2), (7,8), (7,10), (8,1), (8,9), (9,2), (9,4), (9,6), (9,8), (9,10), (10,3), (10,5), (10,7), (10,9). They are the most numerous symbol, appearing in 25 locations, often clustered in the lower half and right side.
* **Light Blue Diamonds (◆):** Found at (1,4), (2,3), (2,5), (3,2), (3,6), (4,3), (4,7), (5,2), (5,8), (6,1), (6,5), (7,4), (8,3), (8,7), (9,6). They appear in 15 locations, frequently adjacent to or near black diamonds.
* **White Circles (○):** Found at (1,2), (1,3), (1,5), (1,6), (1,8), (1,9), (1,10), (2,2), (2,4), (2,6), (2,7), (2,9), (2,10), (3,3), (3,4), (3,5), (3,7), (3,8), (3,9), (3,10), (4,1), (4,2), (4,4), (4,6), (4,8), (4,9), (4,10), (5,1), (5,3), (5,5), (5,7), (5,9), (5,10), (6,2), (6,4), (6,6), (6,8), (6,10), (7,1), (7,3), (7,5), (7,6), (7,7), (7,9), (8,2), (8,4), (8,5), (8,6), (8,8), (8,10), (9,1), (9,3), (9,5), (9,7), (9,9), (10,1), (10,2), (10,4), (10,6), (10,8), (10,10). They are the most common element, filling 60 cells, acting as the default or background state.
* **Green Square (■):** A single instance located at **(4,9)**. This is the only non-diamond, non-circle symbol and is positioned in the upper-right quadrant.
### Key Observations
1. **Clustering:** Black and light blue diamonds are not randomly scattered. They form distinct clusters, particularly in the bottom-left (rows 7-10, columns 1-5) and bottom-right (rows 7-10, columns 6-10) areas.
2. **Adjacency Patterns:** Light blue diamonds are frequently placed directly adjacent (horizontally, vertically, or diagonally) to black diamonds. For example, at (5,2) blue is adjacent to black at (5,4) and (6,3).
3. **The Anomaly:** The green square at (4,9) is a unique outlier. It is the only square, the only green element, and is isolated, surrounded by white circles and one black diamond at (3,8).
4. **Grid Utilization:** The top two rows (1 & 2) contain a mix of all three main symbols (black, blue, white). Rows 3-6 show a more structured, alternating pattern. The bottom four rows (7-10) are densely populated with diamond symbols.
### Interpretation
This diagram likely represents a **state map or configuration board**. The elements suggest a system with three primary states (black, blue, white) and one special state (green).
* **Possible Contexts:** It could be a level layout for a puzzle game (where diamonds are obstacles/items and the green square is the goal), a visualization of a cellular automaton or grid-based algorithm, or a schematic for a network or material structure where symbols represent different node types or properties.
* **Relationships:** The tight clustering and adjacency of black and blue diamonds imply a functional relationship—they may be interacting elements, paired data points, or opposing forces. The white circles represent empty or neutral ground.
* **The Green Square's Significance:** Its singularity and distinct color mark it as the focal point. In a game context, it's the player or target. In a data context, it could represent a unique data point, an error, or a selected item. Its position at (4,9) is not centrally located, which may be intentional to create asymmetry or a specific challenge/path.
* **Pattern Logic:** The arrangement in the lower half suggests a progression or a denser region of activity. The lack of text forces interpretation purely on spatial relationships, making it a abstract representation where the *pattern itself* is the primary information.