## Maze Diagram: Simple Grid Maze
### Overview
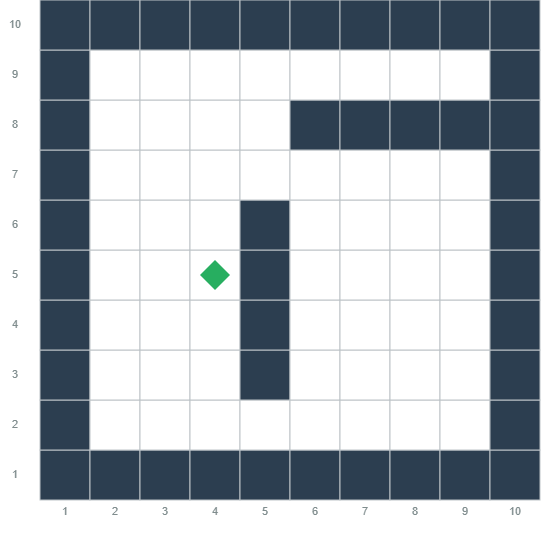
The image is a diagram of a simple maze on a 10x10 grid. The maze is defined by dark blue squares representing walls, and white squares representing open paths. A green diamond is located at grid position (4,5), representing a starting point or a marker within the maze.
### Components/Axes
* **Grid:** A 10x10 grid forms the base of the maze.
* **X-axis:** Numbered 1 to 10 from left to right.
* **Y-axis:** Numbered 1 to 10 from bottom to top.
* **Walls:** Dark blue squares represent the walls of the maze.
* **Paths:** White squares represent the open paths within the maze.
* **Marker:** A green diamond is located at the grid position (4,5).
### Detailed Analysis
* **Maze Structure:** The maze has a defined outer boundary of walls. There is a gap in the top wall between columns 6 and 10. There is a vertical wall extending from row 2 to row 6 in column 5.
* **Starting Point:** The green diamond is located at the coordinates (4,5).
* **Grid Coordinates:** The grid is numbered from 1 to 10 on both axes.
### Key Observations
* The maze is relatively simple, with a clear path from the starting point (4,5) to the top-right corner.
* The vertical wall in column 5 creates a partial barrier, requiring movement to the left or right to navigate around it.
### Interpretation
The diagram represents a basic maze layout. The green diamond likely indicates a starting position or a point of interest within the maze. The maze's structure suggests a simple pathfinding challenge, potentially used for illustrating basic navigation algorithms or problem-solving strategies. The maze is bounded by walls on all sides except for the top, where there is an opening.